Canva and
Conway Copies
One of the many affordable resources available out there is Canva. There’s no denying that it is a powerful tool for even the most inexperienced user to setup a file for their business cards, invites, brochures, flyers, and just about anything else.
However, there are a few steps you need to know to make sure your files are set up for a commercial printer, like Conway Copies.
We want to ensure that you have the best quality product that we can produce, but to do so, there are a few key components that you need to be aware of when creating your designs for print. You may or may not have heard of the print/design terms Bleed and Margins. They are probably the most crucial parts when it comes to ensure your file prints and cuts correctly.
Bleed + Margins
If you are just using your designs for social media platforms or posting anywhere on the web, Bleed and Margins are not super important since digital screens usually fit all content into the viewable area. But with printing, your design is transferred onto a sheet of paper (usually white) and has to be cut down to the intended size. In the printing and cutting process there can be slight shifts that can affect the way your final product comes out. Although we maintain alignments and calibrations on our machines, they can still shift at random times. Leading to white edges and/or cut off text or other elements, such as QR Codes. To counteract this, we need to utilize Bleed and Margins.
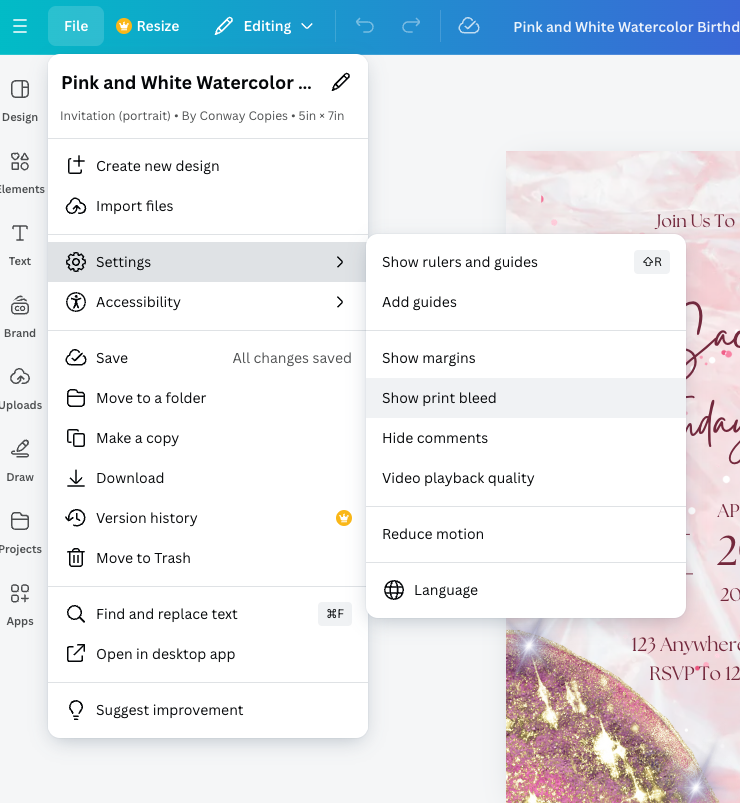
In Canva, Print Bleed and Margins are not typically visible unless you have enabled them previously.
Scroll down to the sections below for steps on how to Enable Bleed/Margins/Guides and Download your designs for printing.
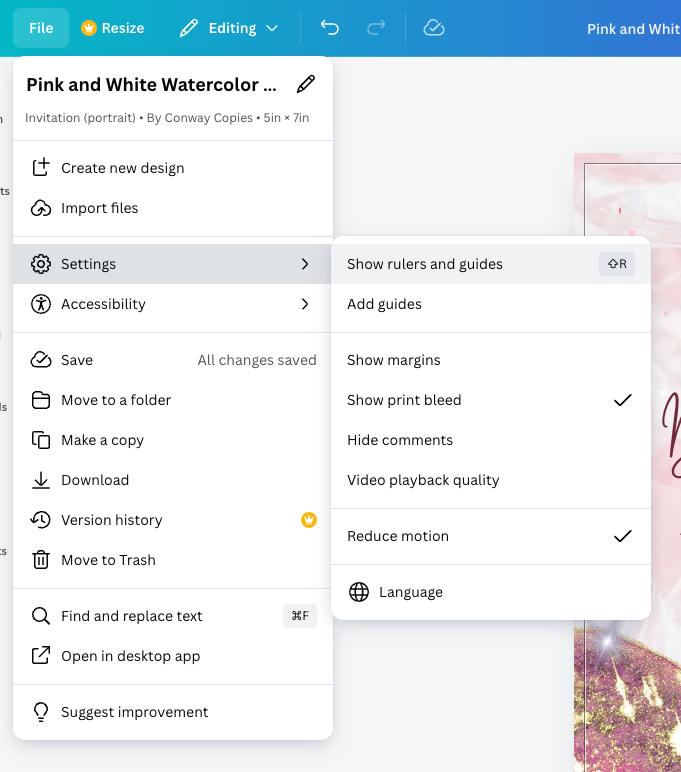
Select File in the top left, go down to Settings, and then select Show print bleed. Then repeat steps for Show margins.
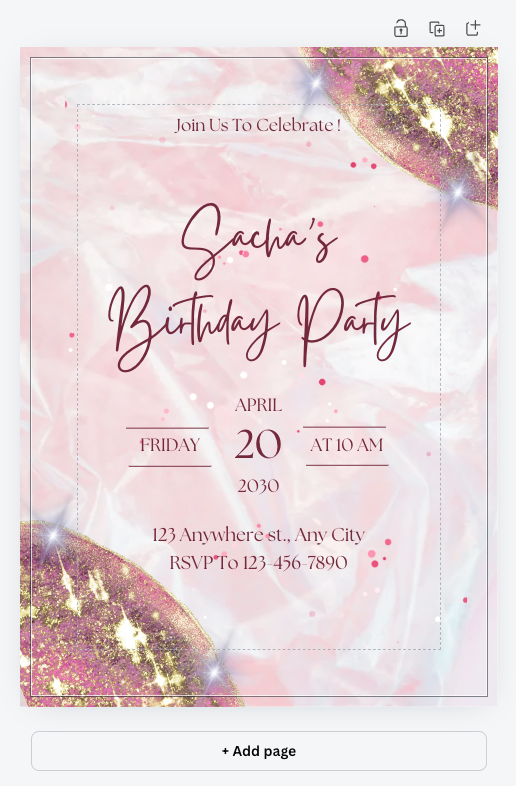
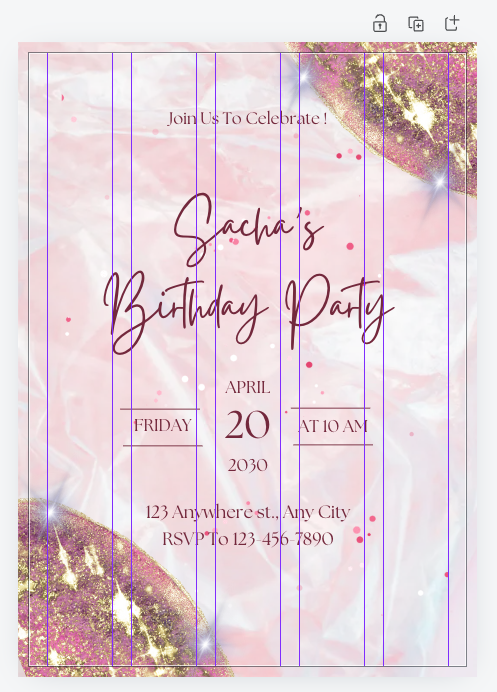
After you have Enabled Bleed and Margins, you should have something that looks like this. The solid line represents the edge of your design after it has been cut. Make sure that your background/images go past that line.
The dashed line is the Print Safe Margins. Canva defaults their margins to 0.5 inch, which is ideal for a nice, evenly spaced design with plenty of breathing room for your information. However, if you use those kind of margins on a small design, like a business card, you won’t have any space leftover. See the next section for Adding Guides.
If you need to add guides, you can enable them by selecting File, Settings, and choose Show rulers and guides. After selecting that, it should look something like the image below, with a bunch of lines on it that don’t pertain to anything you’re working on. We can fix that. Scroll down further and we will customize the guides.
Head back to File, Settings, and then select Add guides.
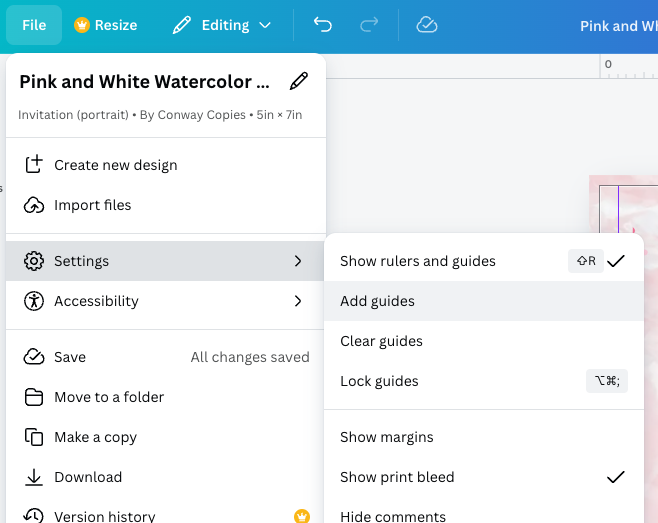
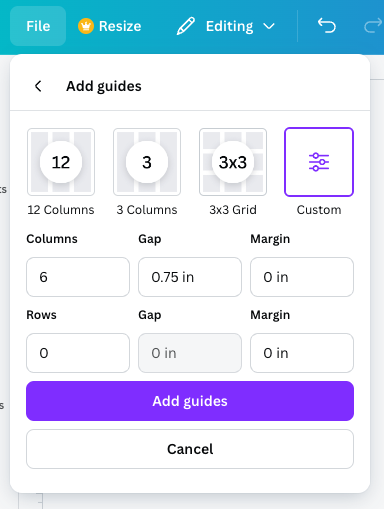
If not already selected, choose the Custom option. Enter 0 for the Gap and Columns. This will take away all of the current guides. Then in the Margin sections, enter either 0.125in or 0.25in (depending on the size of your design) and then select the Add guides button.
Important note: make sure both Margin entries have the same number in them.
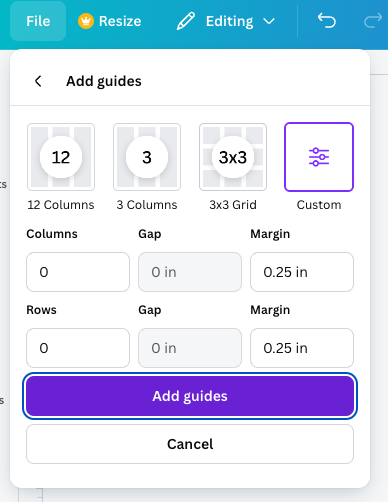

After that, you should have a design with smaller Margin Guides. To ensure that your text is not cut off, please make sure you have a 0.125in margin on all side. 0.25in is preferred, but 0.125in is the bare minimum. Next up is exporting with Bleed.
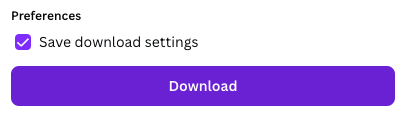
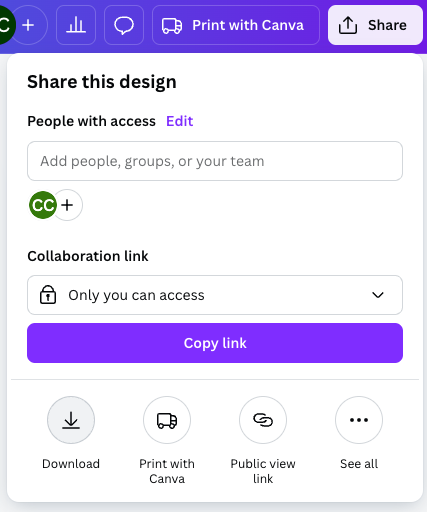
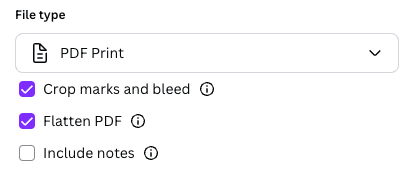
After you have your design ready to go, you will need to download your file to send to us for printing. Select the Share button on the top right and then select Download. From the File type dropdown menu, select PDF Print. This is the preferred file format for printing.
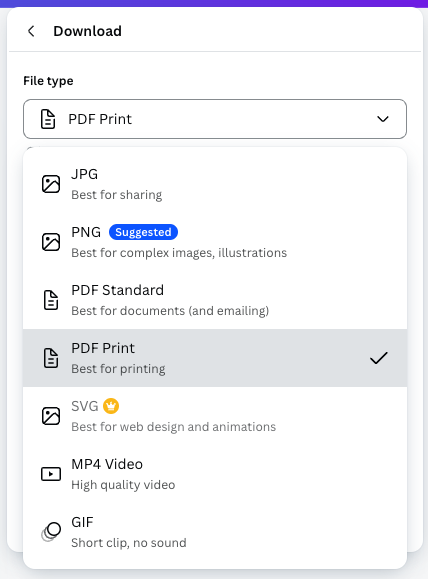
Next, make sure to check the boxes for Crop marks and bleed and Flatten PDF. By default, Canva will have RGB selected for the color profile. If you are using Canva Pro (their subscription service), you will be able to select CMYK. Most commercial printers use CMYK printers and you will have more accurate colors if you use this profile. It isn’t required to save it in CMYK, but please note that your printed product will look slightly different than it does on screen if using RGB.
If concerned about color accuracy, please request a proof when you email your file to us and we will be happy to print out a sample for you to come look at in the store.

After all of these steps, you may choose the Download button to save your file to your computer/tablet and email it to us at orders@conwaycopies.com.
Extra tip: check the box that says Save download settings to keep PDF Print and other selections ready for the next design you download.